 WINSENDER is a software designed for those who want to do WhatsApp Marketing using the official WhatsApp APIs. WinSender is the ideal solution for all companies and freelancers who want:
- Send WhatsApp messages (even in bulk, and also to customers not saved in the phone’s address book)
- Set up automatic replies on WhatsApp based on rules and keywords
- View all messages received from customers
Unlike “unofficial” software like WhatSender, WinSender uses the official WhatsApp APIs, which allows you to have the following advantages:
1. No risk of blocking or baning your business account
2. At least 1000 free conversations per month and the ability to interact automatically with customers
3. Send messages with your company’s certified name (as sender)
WINSENDER offers the following 3 basic features:
Bulk Sender feature: allows you to send a message to a list of customers simply by importing the list of phone numbers and choosing the message to send.
Auto Responder feature: rautomatically responds to your customers according to precise rules and very easily configurable commands. Possibility also to create dynamic menus with which your customers can receive all the requested info by selecting commands.
Received Messages feature: Allows you to see messages received from your customers on your WhatsApp Business API account in real time.
[FASE 1] CREATE AND CONFIGURE WHATSAPP API
The first thing to do is to create a WhatsApp Business account for developers, in order to obtain the APIs, that is, information that is then used to make the software communicate with WhatsApp and thus be able to start doing WhatsApp Marketing.
Click on the link below to read the step-by-step guide:
- How to Create and Configure WhatsApp Business Cloud APIs
- How to set webhook to receive incoming messages
[FASE 2] INSTALL WINSENDER ON YOUR PC
Once you have the API data of your WhatsApp Business Cloud account, you can proceed with downloading and installing WINSENDER. Here is the download link of the DEMO and free version of the program:

NOTE 1: The DEMO version of WinSender allows you to understand how the system works. In that version, you can set up to 20 characters of responses, and you can only import contacts manually.
[FASE 3] CONFIGURE WINSENDER
The first time you open WINSENDER you will see the following main screen.
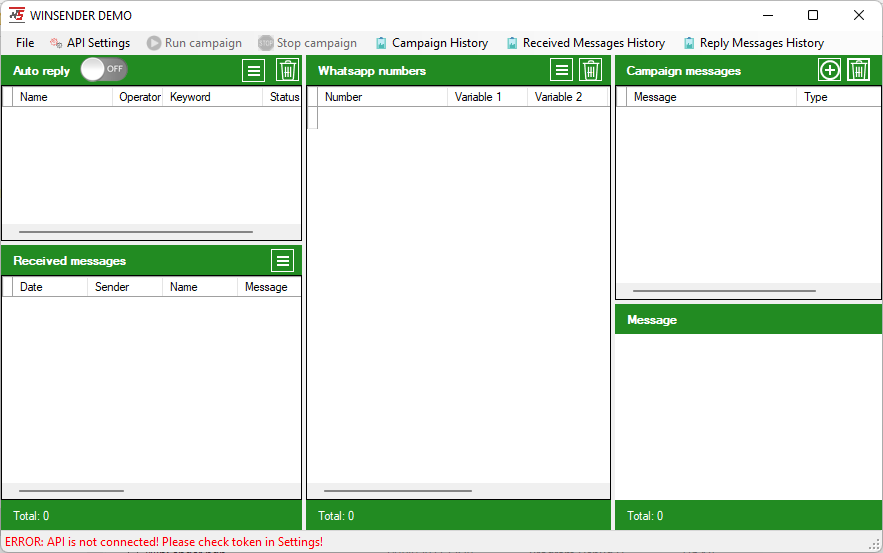
To get started you will need to access the API SETTINGS menu and here you will need to enter the token, phone number, phone number ID and business account ID, as shown in the figure below.
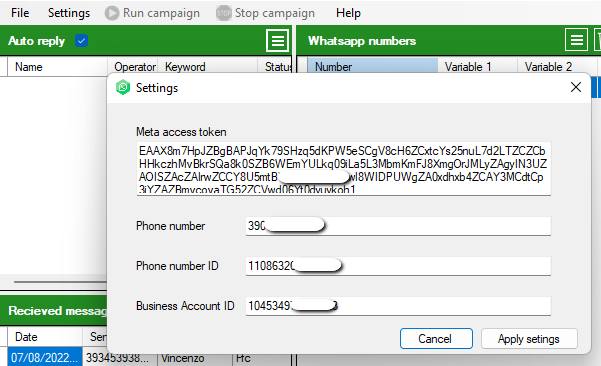
After entering this data press on APPLY SETTINGS and the program will connect to the WhatsApp APIs.
If no error appears, you can start using the WinSender functions described in the next paragraphs. At the bottom left of the program will appear the message “READY! API is connected”.
WHATSAPP BULK SENDER FEATURE
With WinSender you can send WhatsApp messages to all your contacts, even those NOT saved in the address book of your mobile.
Using WinSender to send WhatsApp messages (both textual and multimedia) is very simple. Before proceeding you should know that the WhatsApp Business Cloud API offers 1000 free conversations per month, each additional conversation will have an additional cost. You can check at any time the number of messages sent, any costs and limits from this page.
Step 1. Import contacts
Once WinSender successfully connects to the WhatsApp APIs you can proceed to upload the contacts.You can import contacts in 2 ways:
- Manually (by writing the numbers in the relevant box)
- Import contacts from Excel, CSV, or TXT files
NB: With the DEMO version of WinSender you can only import contacts manually and you can enter a maximum of 5 numbers at a time.
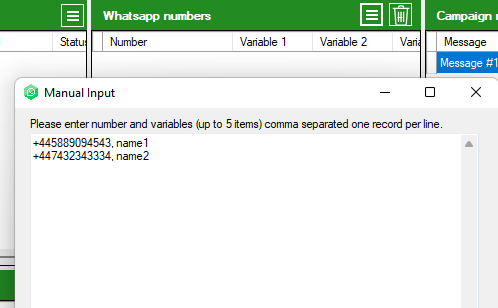
To enter numbers manually click on the three horizontal line icon in the WhatsApp Numbers section and then click on Manual Input.
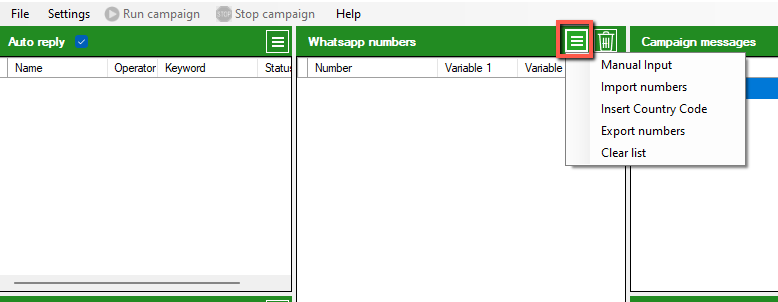
A window will open where you can enter phone numbers with country code.
You can enter only the phone numbers (with country code) or even enter the number and variables separated by the comma. For example, you can write the phone number and the name of that contact first variable: the advantage of entering the name is that you can send personalized messages by automatically inserting the name of that contact in the message itself.
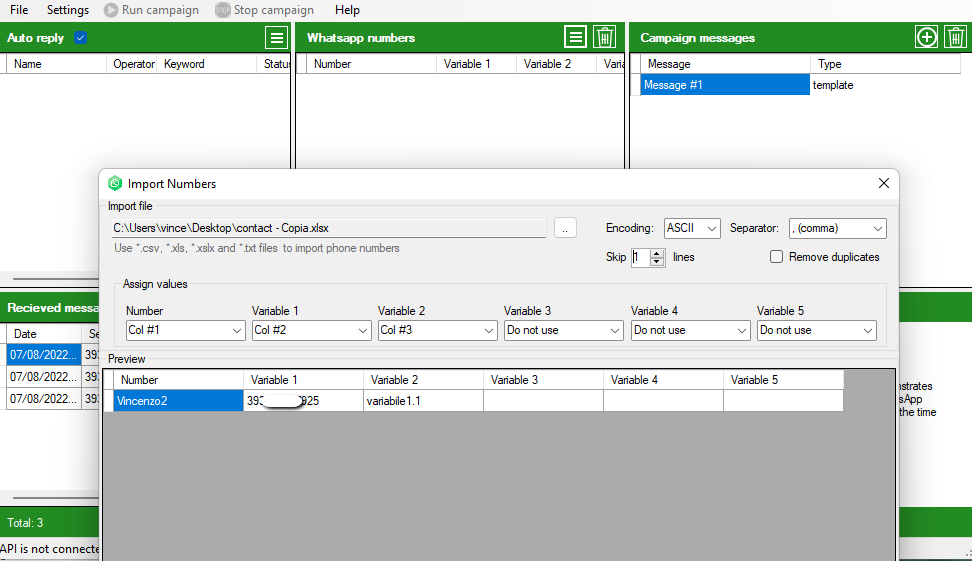
To import many contacts you can alternatively use the Import Numbers from file option and select the excel, csv or txt file containing all your contacts.
If you choose to import contacts from files, the window shown below will open where you can preview all the data to be uploaded. In addition to the name and number of the contact, it is possible to add variables in the file that can then be automatically inserted into the message to be sent.
Step 2. Create Message to Send
From the right of the program you can select the message to send. The program automatically detects all messages that have been created and approved in your Meta for Developers account.
So first you will need to log in to this Meta page and create the message template you want to send to your contacts.
Click Create Message Template, choose name, category, and language, and then press Continue. You can then enter the content of the message, textual or multimedia, with or without variables.
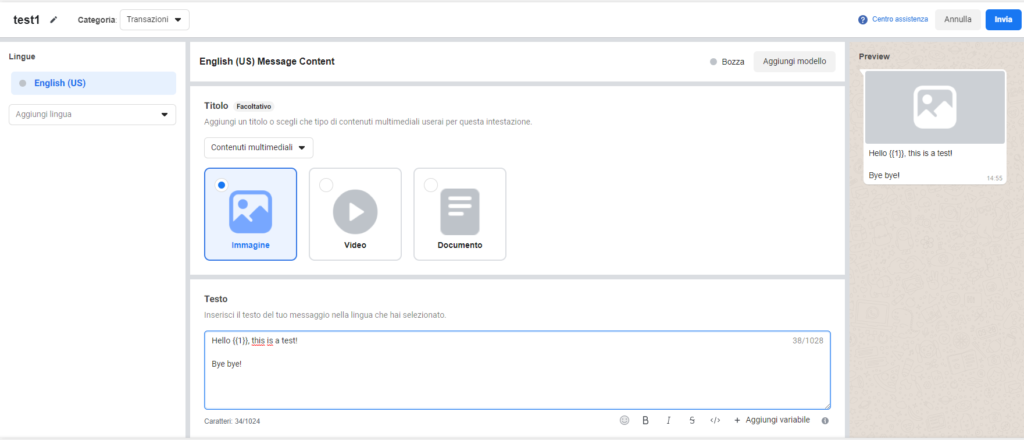
On the right of the page you can see the preview of the message. If by chance you have created a multimedia message containing also variables, we recommend that you click on Add template at the top in order to let Facebook know the type of attachment to be inserted (eg image or video) and the purpose of the variables you are entering (for example to customize the message with the customer’s name).
Once you have completed the message click on SEND at the top right to request approval. The timing for approval is very fast, you will receive an email that will notify you.
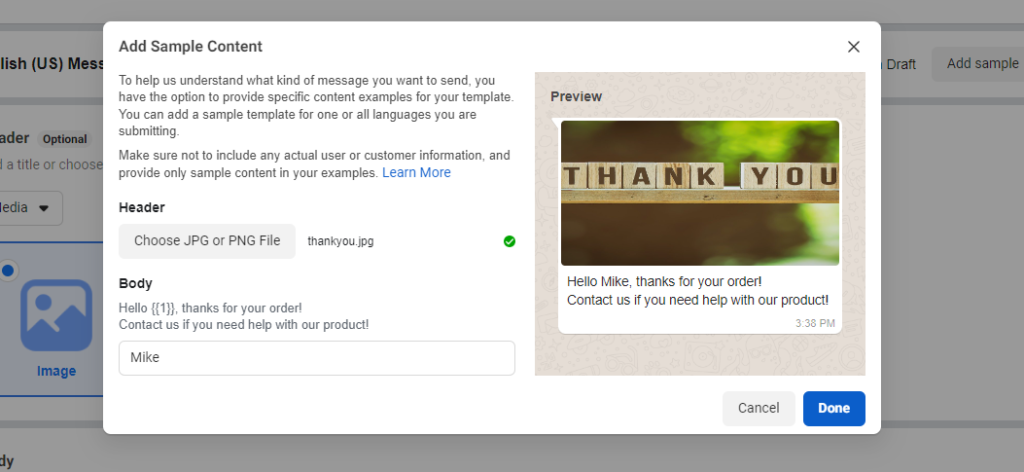
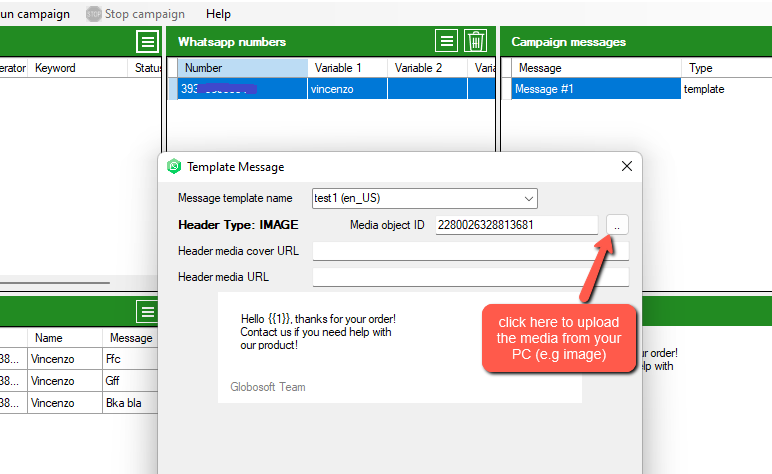
All approved messages will appear within WinSender in the Campaign Messages section. After selecting the message template to use, a screen like the one shown below will open where you can upload any attachments (ad. example an image in the case of our test model).
Add the message you want to send and finally press the RUN CAMPAIGN button to start sending. At the end, a summary window will automatically open with the result of the sending.
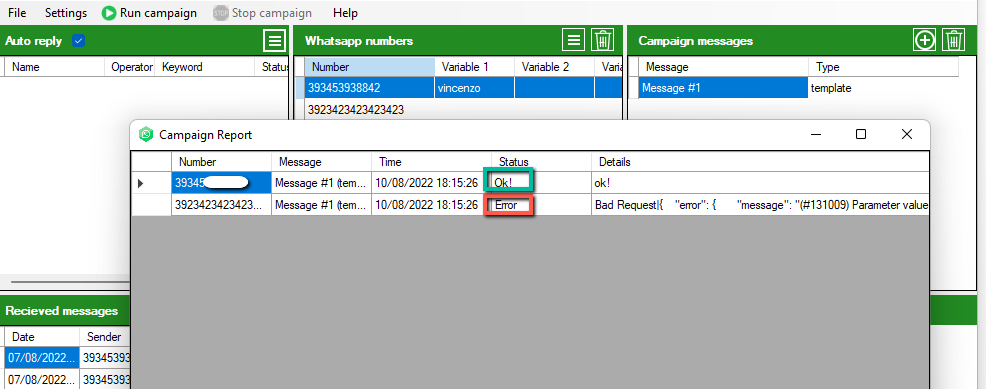
Successfully sent messages will appear on your contacts’ screen and you can start interacting with them.

If a customer were to reply to your message, you can read in real time his response in the lower left of the program ( Received messages section), and by double-clicking on the message received you can send a new response and start a conversation.

NB: In order to track the messages received you will have to do a simple configuration on Meta for developers. The following paragram explains in detail what to do.
How to Track Received Messages
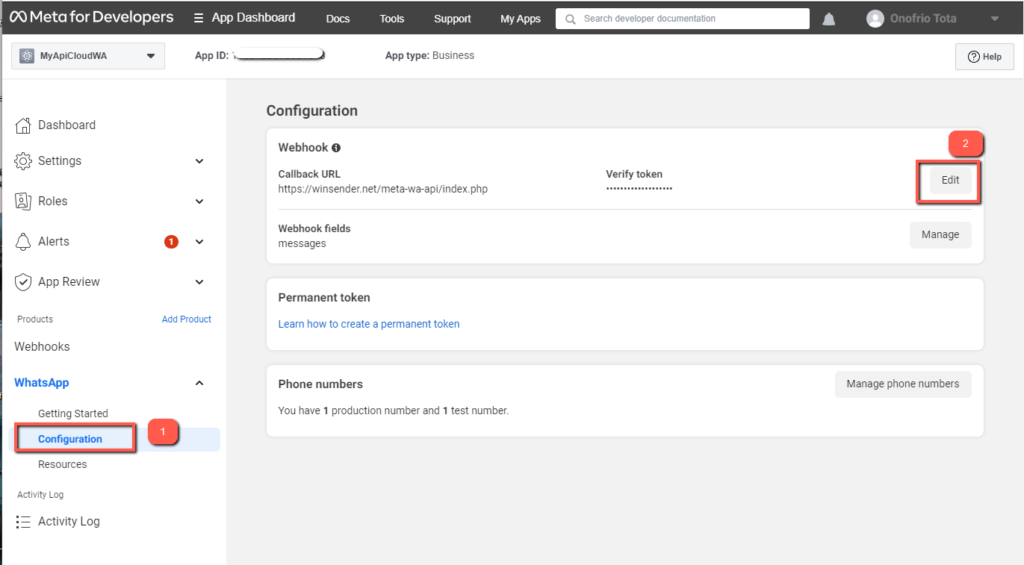
To get started, go to the management page of your APPS on https://developers.facebook.com/apps/. Then click on your app (eg. MyApiCloudWA) and the control panel will open.
Click on the left on WhatsApp –> Configuration and press on the top right on EDIT
In the window that opens you must enter the following data:
Callback URL: https://www.winsender.net/meta-wa-api/index.php
Verify token: winsender
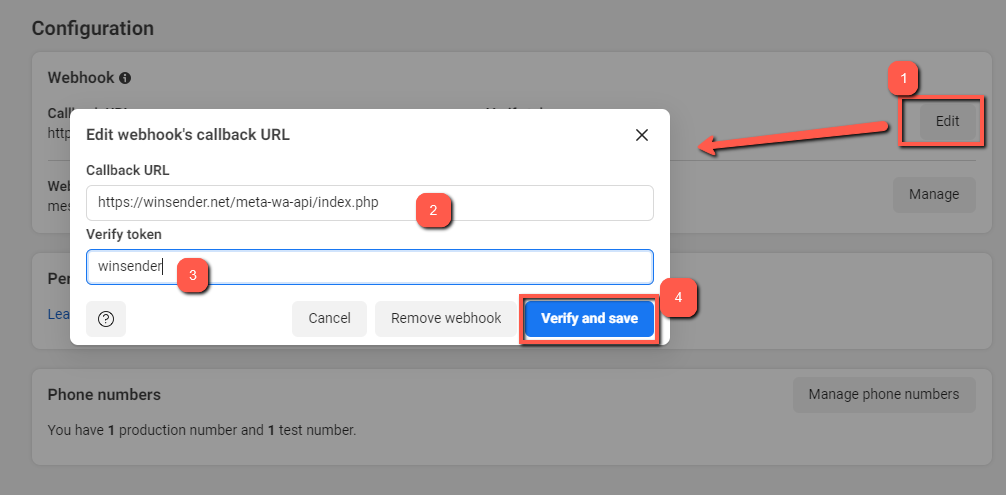
Finally press the VERIFY AND SAVE button to save.
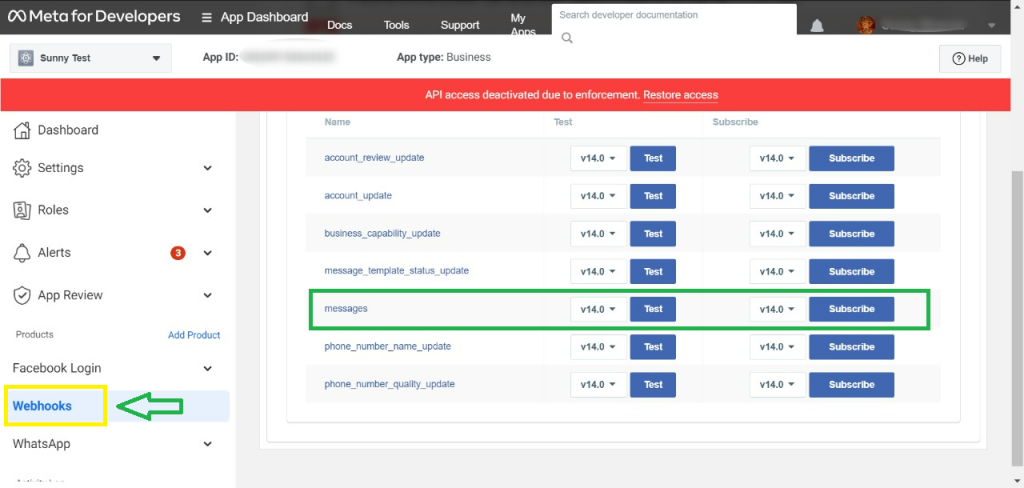
Now go to the “Webhooks” section (as highlighted in the figure below) and in correspondence with the messages item click on “Subscribe” to activate notifications and tracking of received messages.
Fact! Now WinSender will be ready to track and view all the messages you receive on your WhatsApp Business account.
WHATSAPP AUTO RESPONDER FEATURE
Here’s how to use WinSender to automatically respond to your customers and provide all the information you want by configuring dynamic menus with commands.
Usually companies that want to provide as much information as possible of their services and products, send a message to all their customers, a message in which “commands” are then provided: each command that the user requests, then corresponds to a new information. for example you could send such a message
Dear Customer
for more information:
>Digita 1 to see the list of our products
>Digita 2 to discover the special offers of the moment
>Digita 3 to receive info about our company
This message should obviously be created on the Meta for Developers control panel and sent to all your customers with WinSender.
So that every command sent by your customers is automatically sent the relevant response, here’s what you need to do on WinSender.
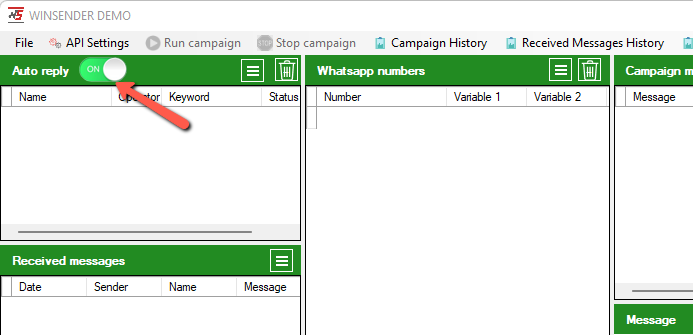
First you need to configure WinSender by inserting the WhatsApp APIs as explained at the beginning of the guide, and it is also necessary that you cinfiguri the Webhook in such a way as to track the messages received (read the previous paragraph). Then activate the AUTO REPLY function by selecting the switch at the top left to ON.
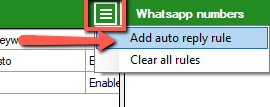
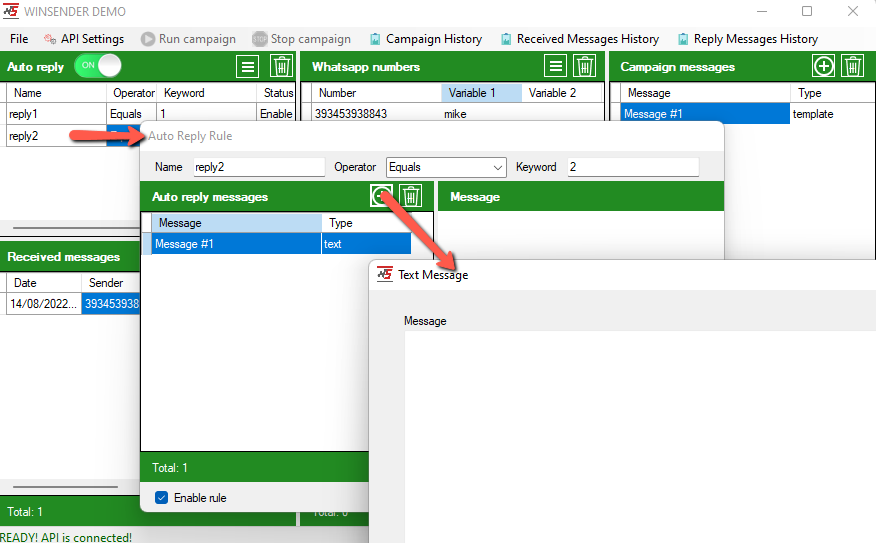
Then click on the three horizontal lines and click on Add Auto Reply Rule to add a new automatic response.
A new window will open where you can name the rule (e.g. “Command #1”), enter the keyword or even letter/number (e.g. “1”) and indicate in the Operator menu when to send the response, for example when the user sends the exact same word (“Equals”), or when you receive a message that begins (“Start with“) or ends (“End with“) with that word key. You can also set the operator “Contains” that sends the response when in the message there is a word similar to our keyword.
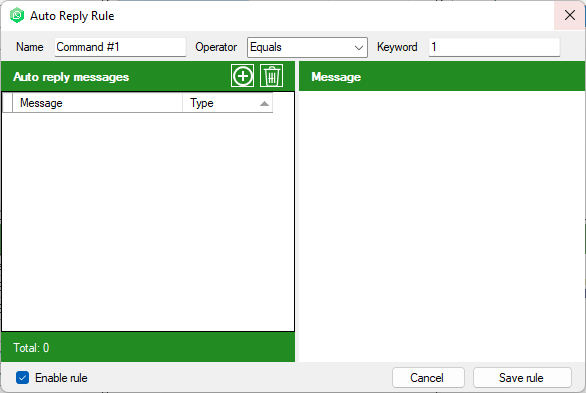
Then click on the + icon to add the automatic reply to send when you receive that command. You can add a message already saved as a template on Meta for Developers or add a new text or multimedia message without needing to create a template because it is a response to a message from your customer.
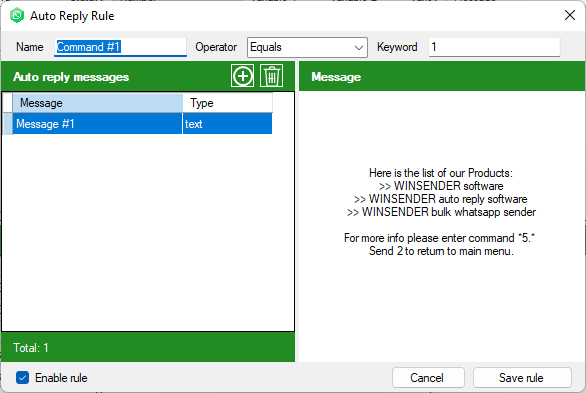
Finally click on SAVE RULE to save and activate the rule. From this moment on, if a user sends a message with that keyword he will receive the answer you have prepared.
All saved automatic replies will appear on the left of the program and by double-clicking you can edit or remove them.
At any time you can activate or deactivate the sending of these automatic replies by clicking on the toggle at the top.
To test the operation send a WhatsApp message from another device.Here’s an example of how the end customer will see all the automatic replies based on the commands they send:
All messages received and phone numbers of customers who have sent a message will be viewable on the RECEIVED MESSAGE screen
From this section, by double-clicking on a line you can also manually reply to a single customer.
As you can see, thanks to WINSENDER it is possible to create an INTERACTIVE communication with the customer / user and it is possible to send a series of information (all automatically)
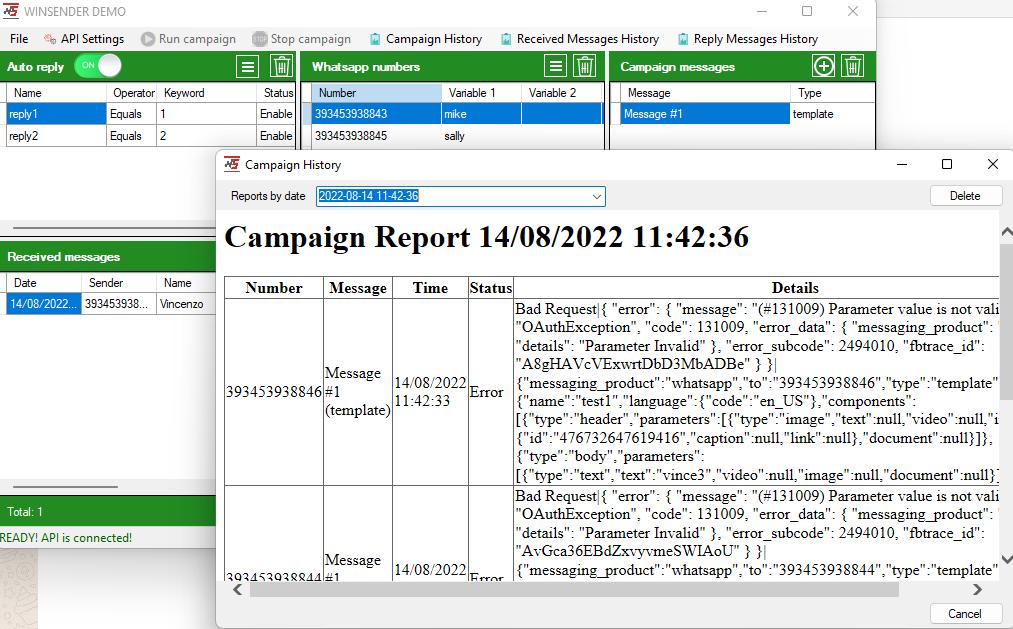
REPORT
In the menu at the top of the program there are all the reports you might need: history and reports campaigns executed, history messages received and history of your replies (both manual and automatic).
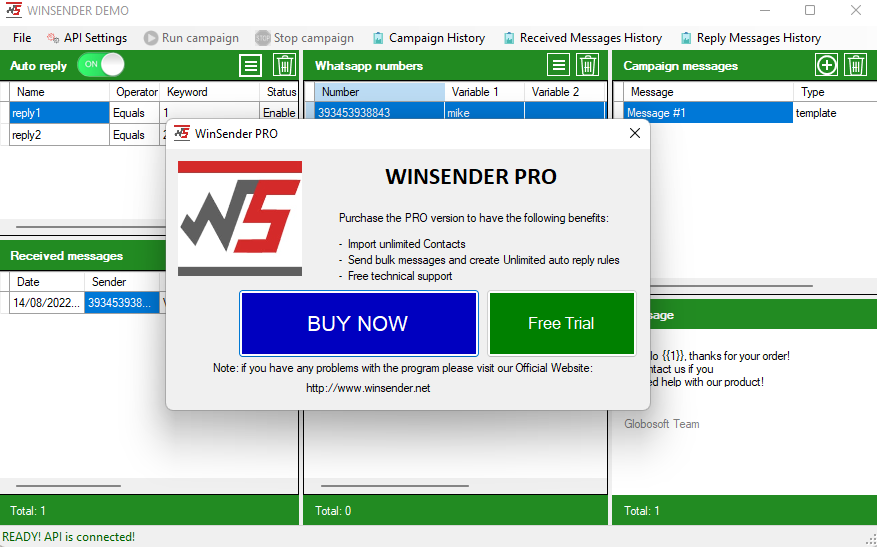
DEMO VERSION LIMITS
With the demo version of the program you can enter a maximum of 2 rules for automatic replies. Buy the license of the program to have no limitations!
Click at the top right of the menu on PRO VERSION and the window will open with the BUY NOW button to purchase the license.